
Please note, that the Eye-Fi cards used in this project have reached the EOL and are no longer supported by manufacturer’s software, so when following my guidelines, I suggest using a regular SD card and regularly copying the pictures to a remote location.
I needed something to make a time lapse movie of a construction site. The basic requirements were:
- good quality pictures
- interval between pictures not less than 15 minutes
- taking pictures only during working hours
- ability to upload the pictures to web
- weatherproof design
- remote management
I had done one time lapse project with a GoPro Hero2 and Arduino, but there were two bad things – the GoPro has a really wide angle lens, and its picture quality in dark is quite bad.
After looking around in my workshop, I found an old Nikon D40, a RaspberryPi, a cheap Tenda router and a 3G USB modem. So I came up with the following:
- The camera will be controlled by a RaspberryPi running gphoto2
- Taken pictures will be uploaded to Google Plus and my desktop computer by Eye-Fi SD card
- To power the camera, it’s good to use a battery dummy. They can be purchased cheaply from Ebay
- For weatherproof housing it’s ideal to use waterproof cases from Explorercases. I chose model 2214
- With the help of a mobile broadband and dynamic DNS, I’ll be able control the whole setup and change camera settings from anywhere
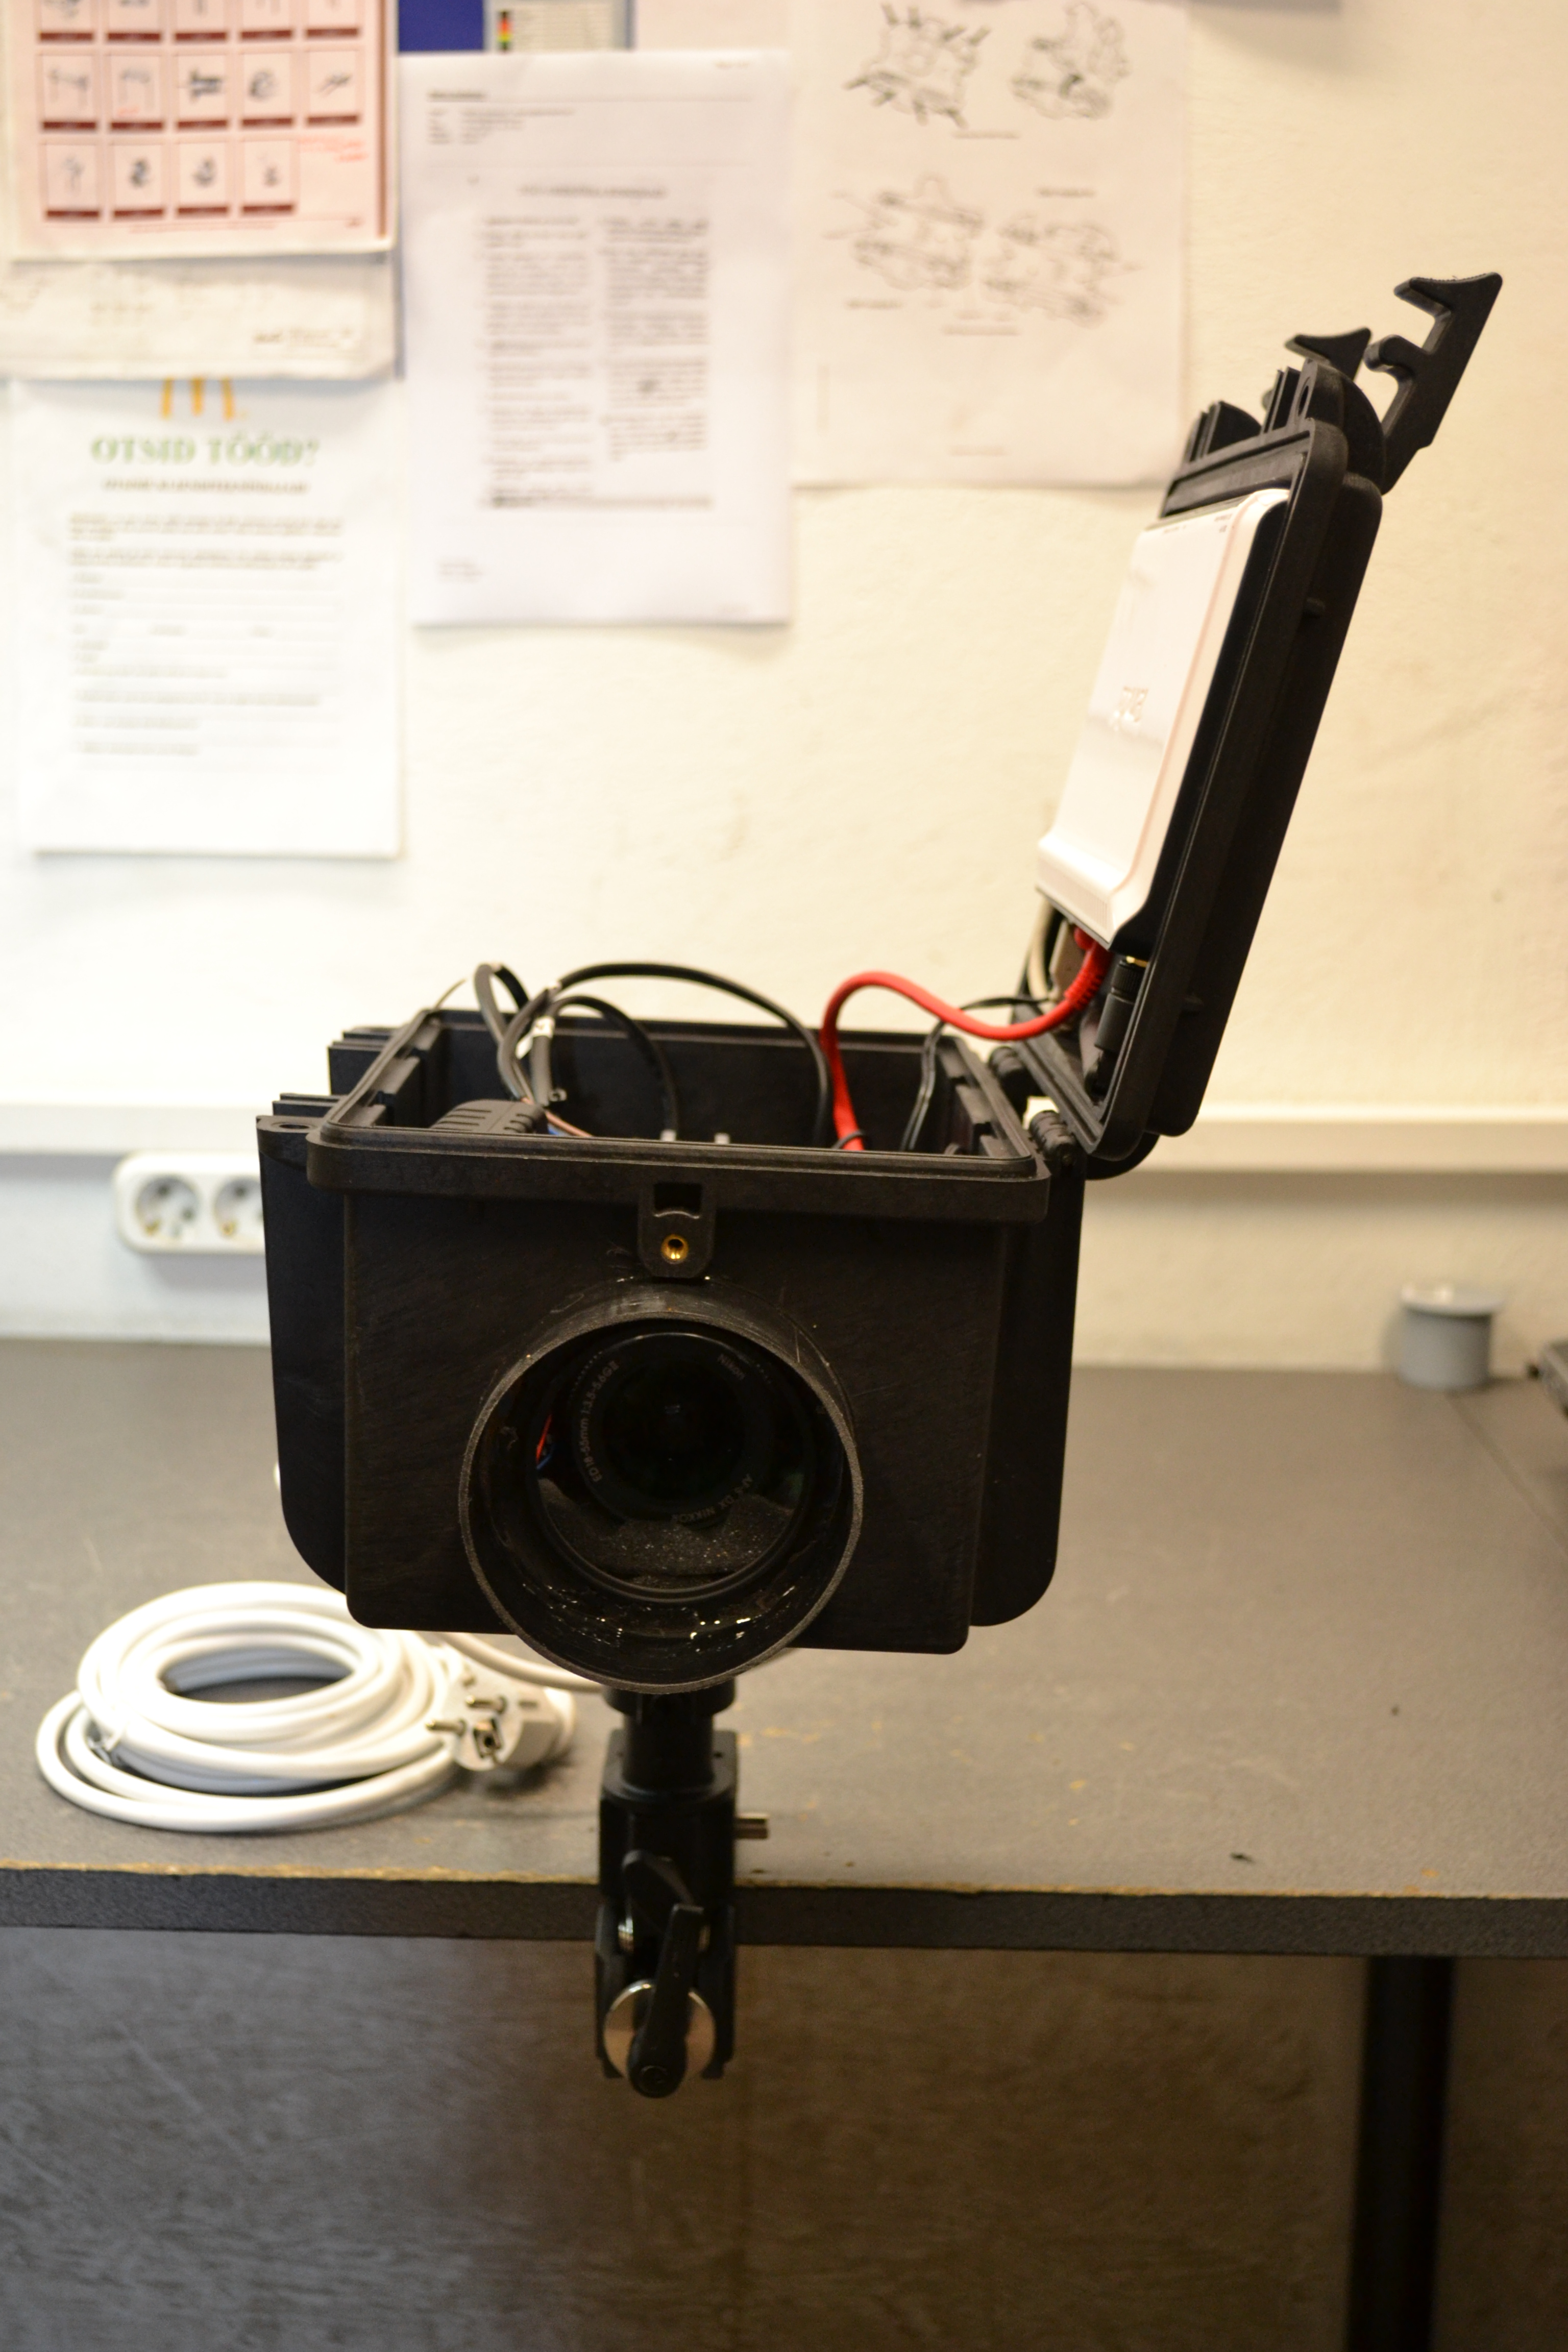
After collecting everything and a little drilling-sawing-filing, I had a nice little time lapse-machine:


I used a cheap 72mm Hoya UV filter to make the window, a piece of 90mm PVC pipe to keep the rain and snow off the window, and epoxy glue to fix them to the case.
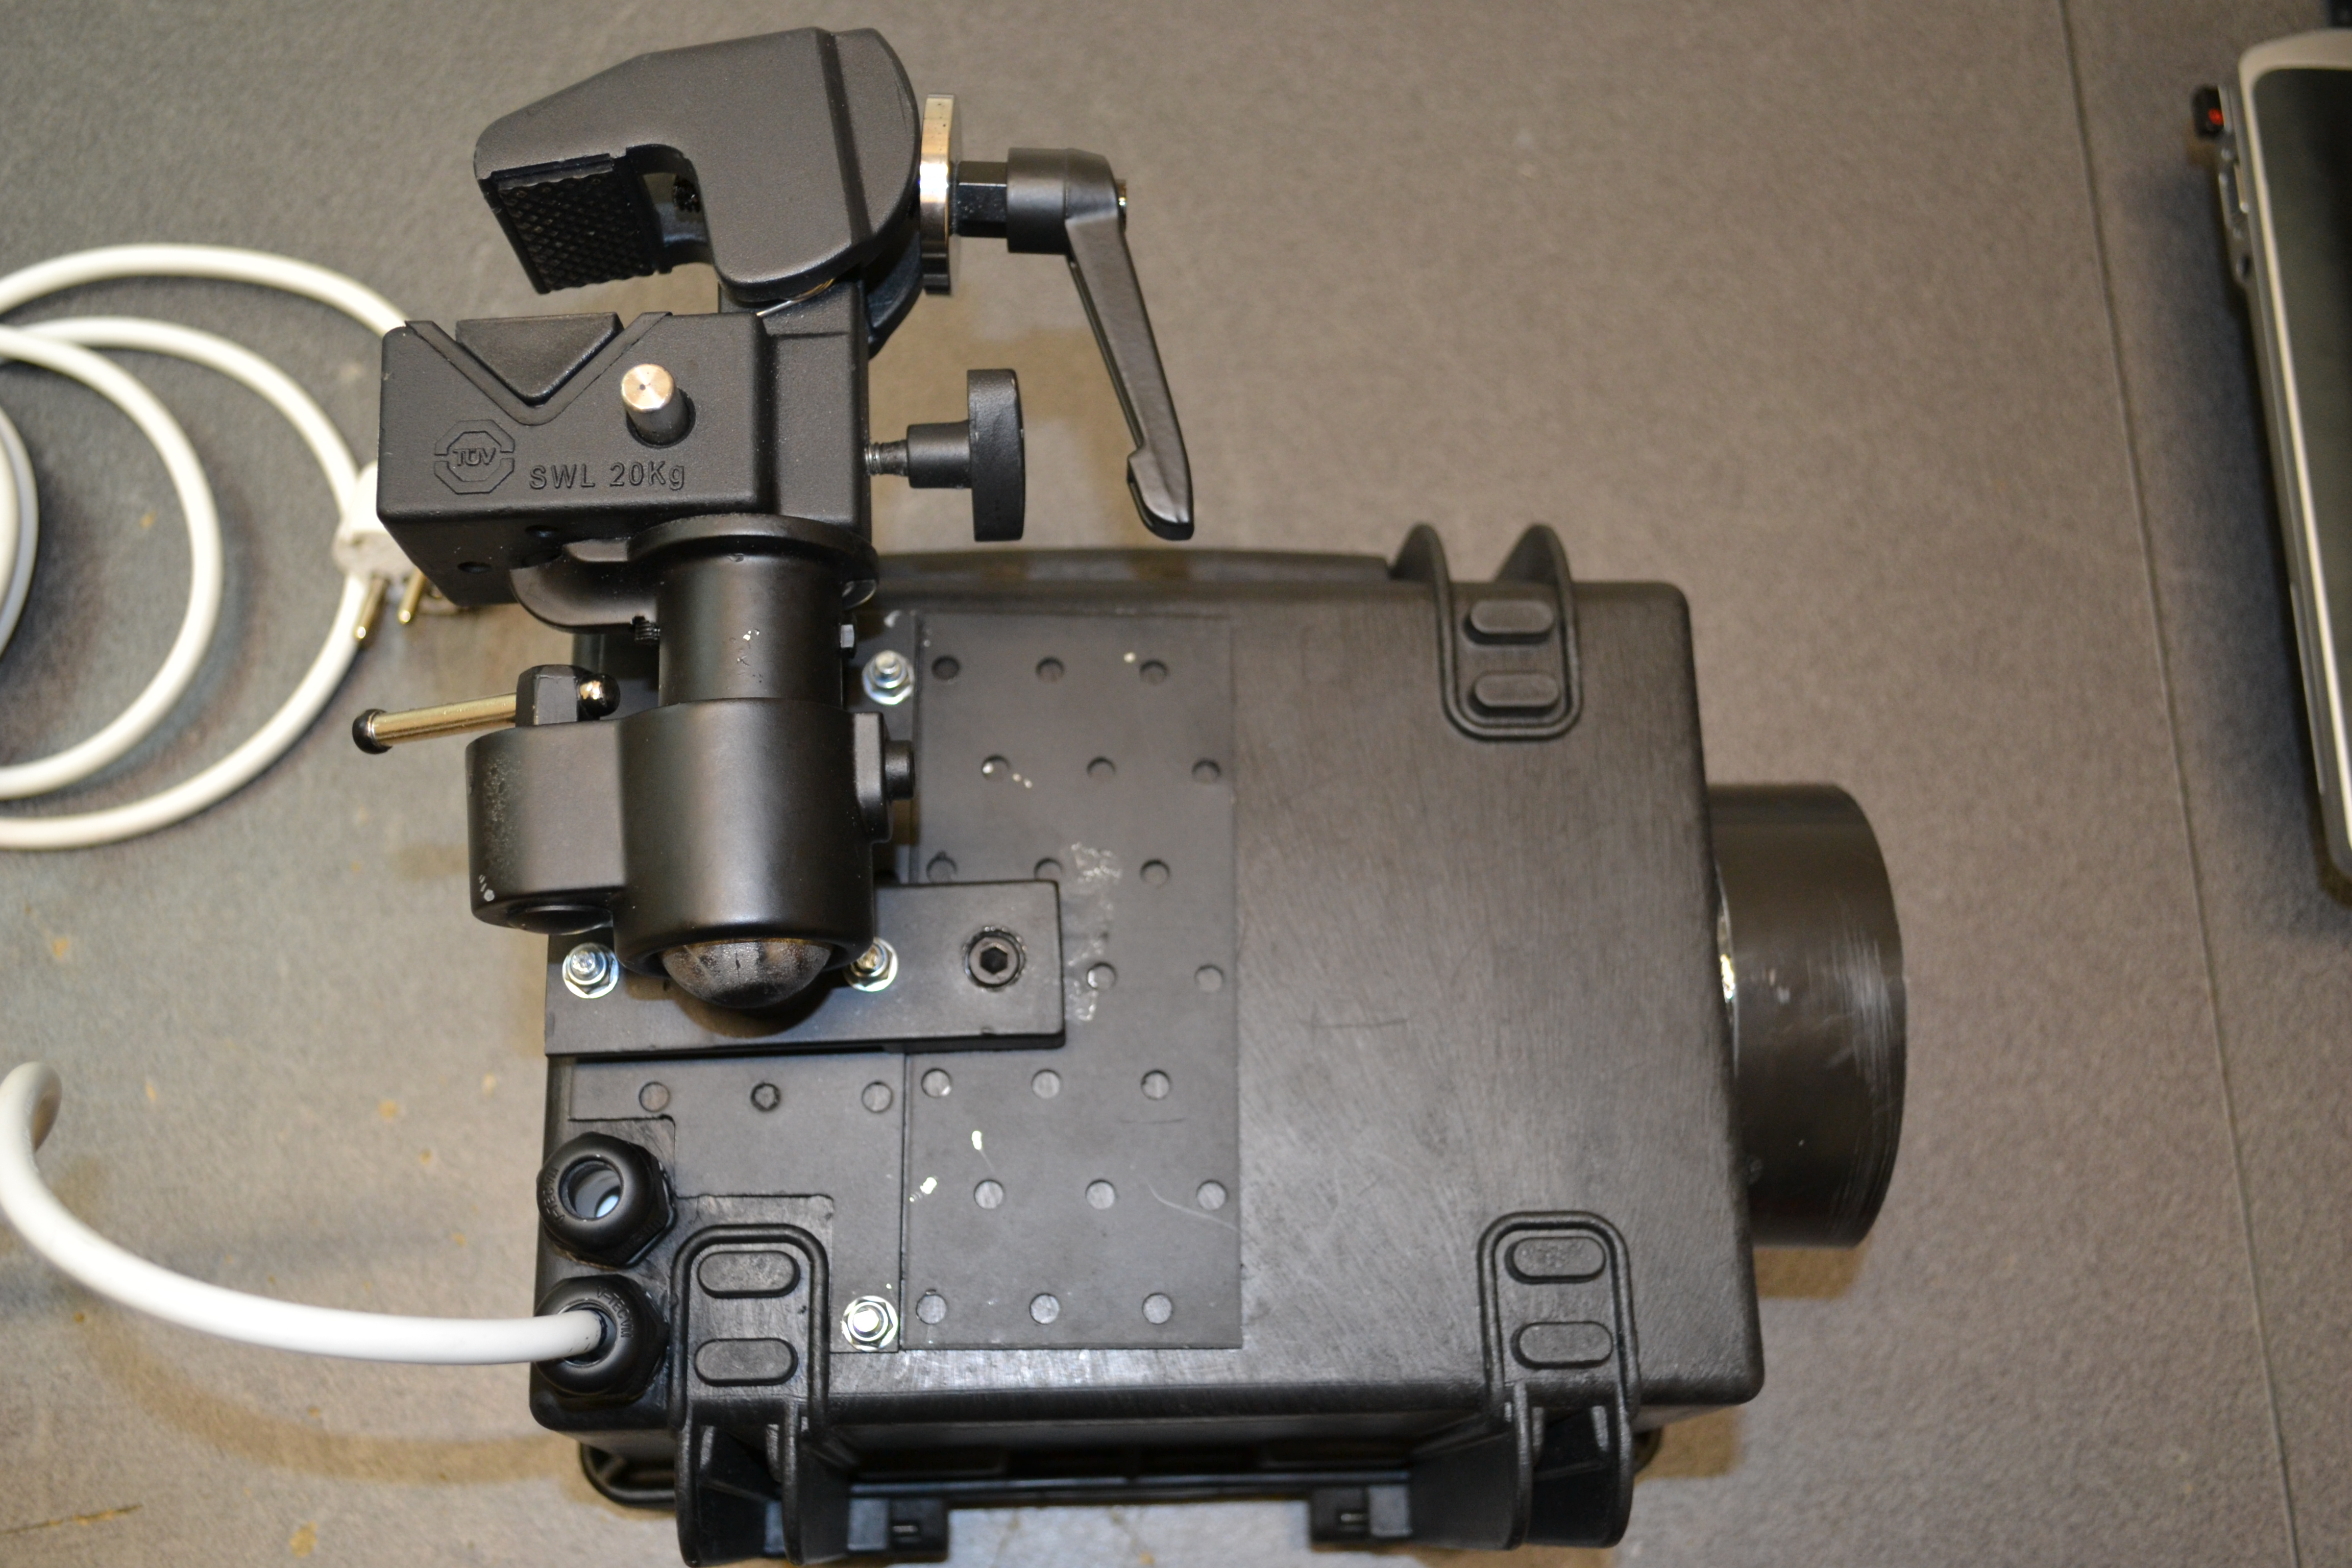
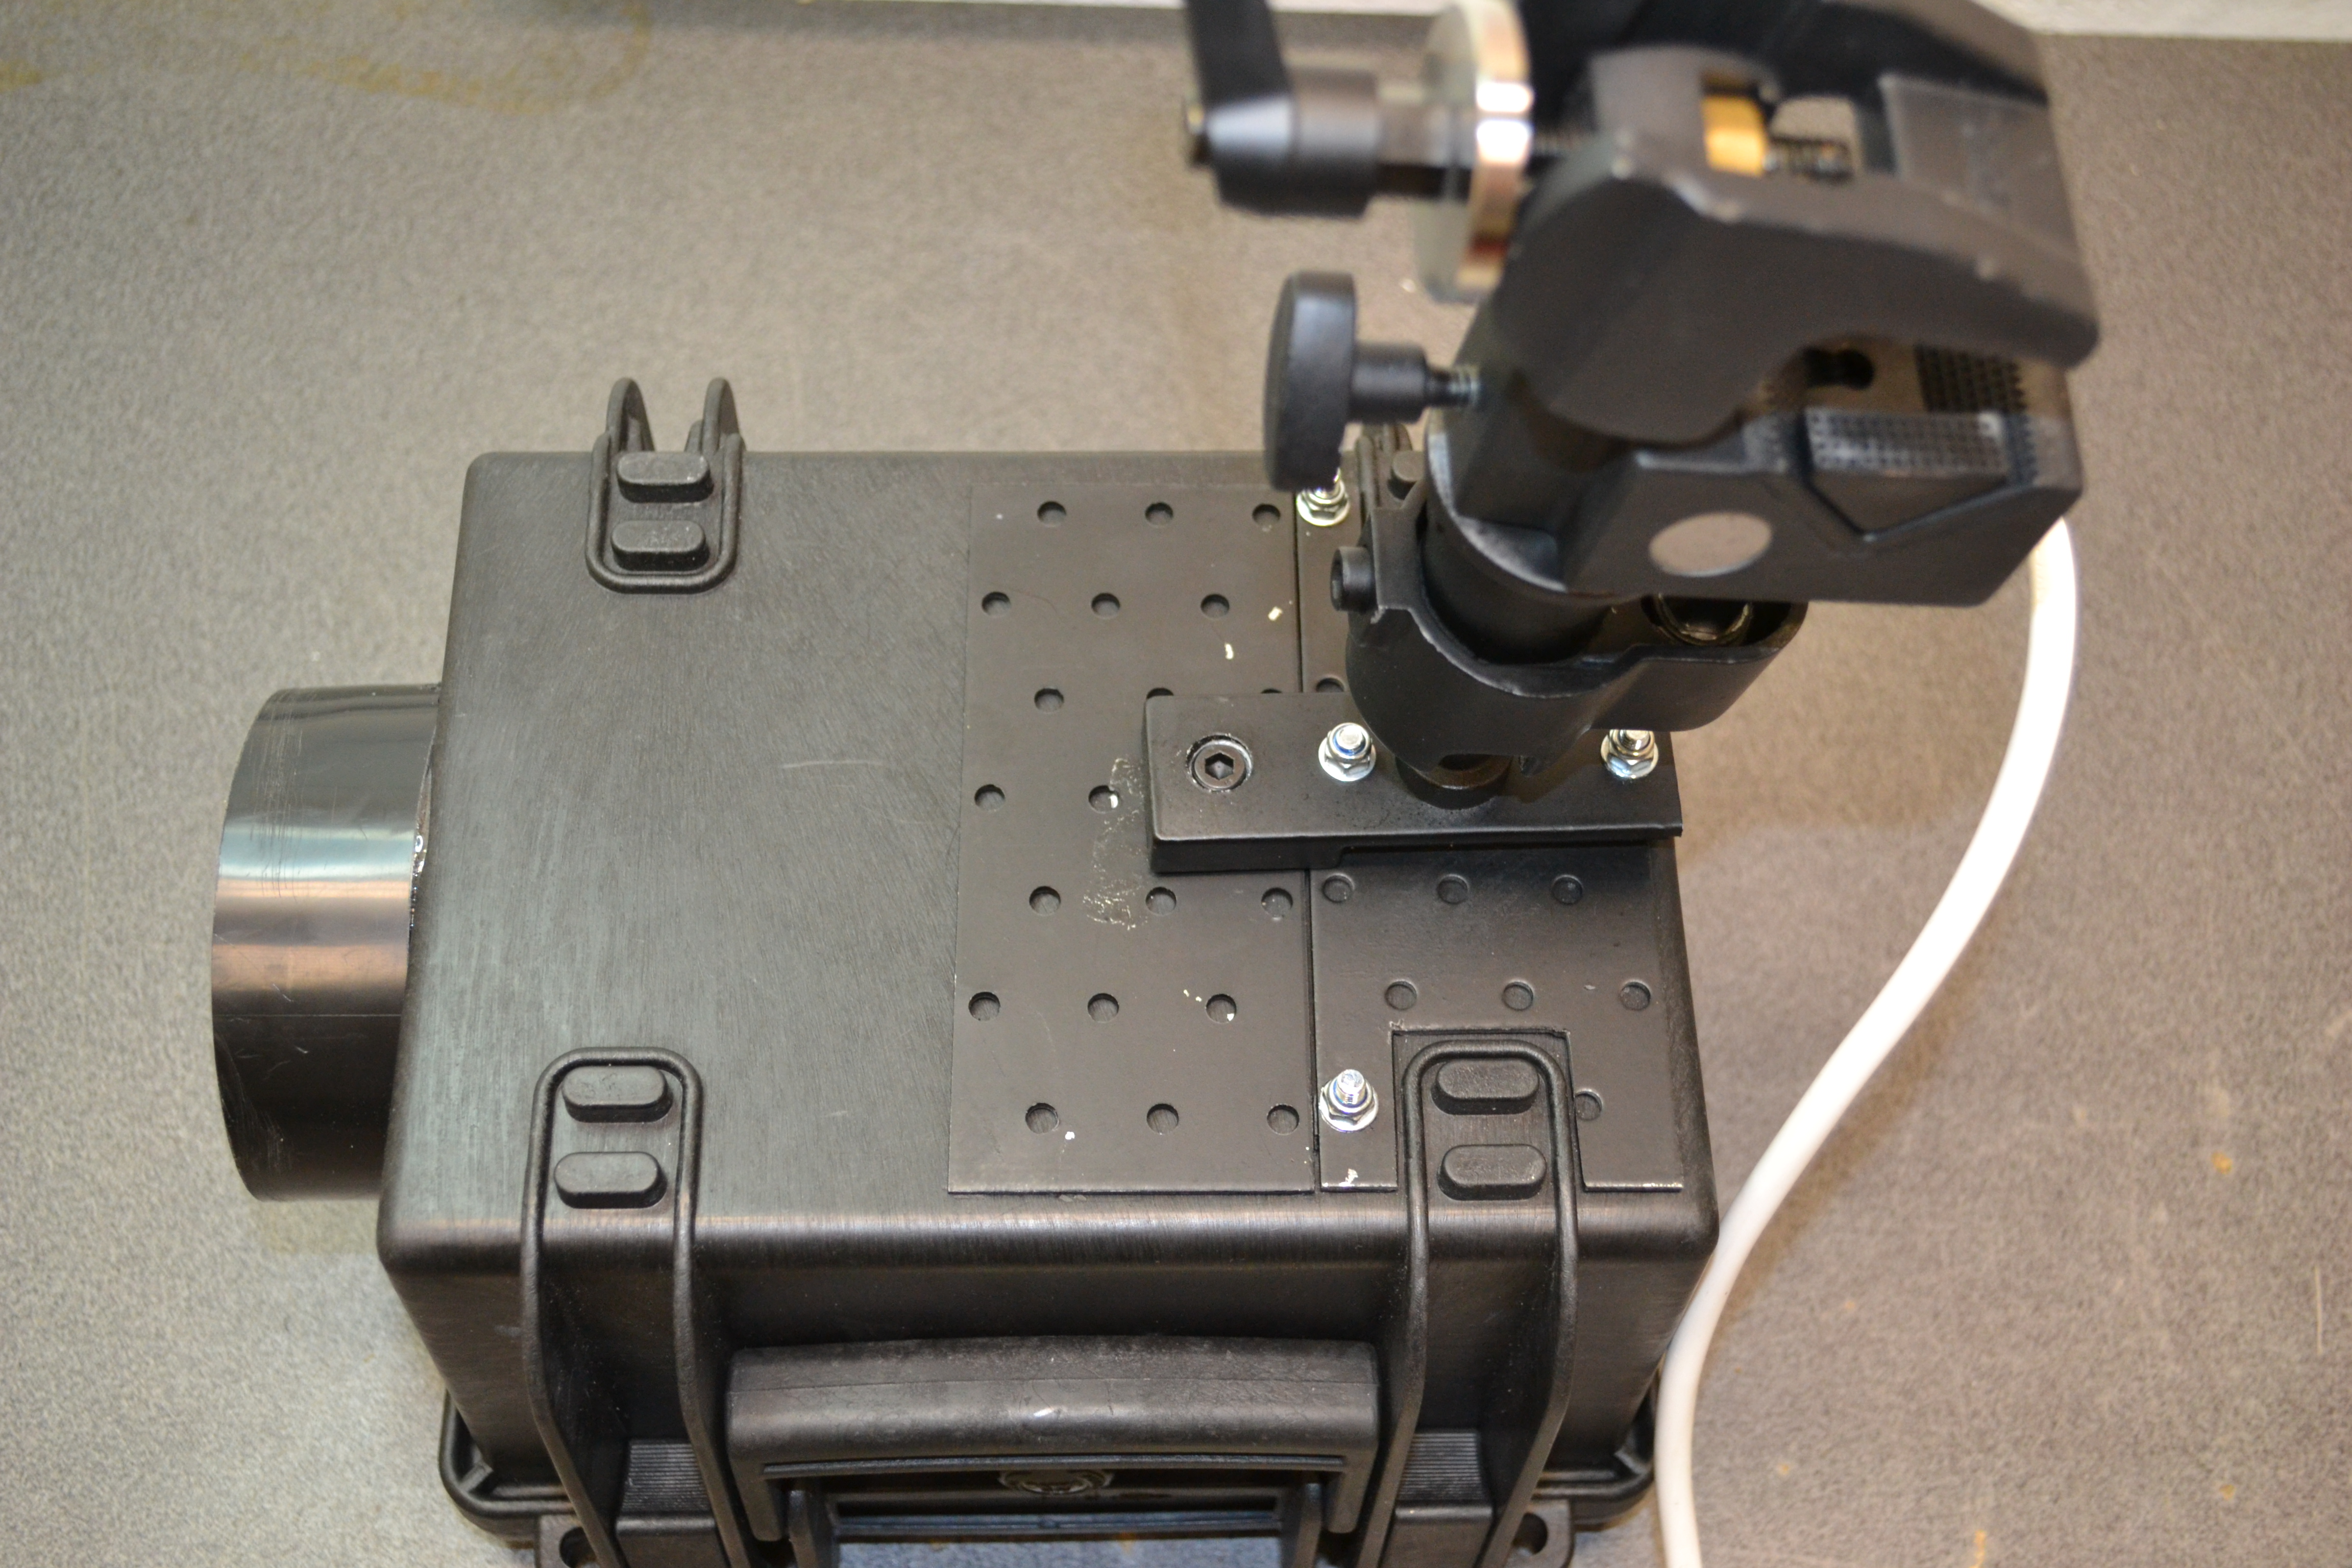
Now I needed a way to fasten the box to its position, and to adjust its angle. So, a ball head and a clamp would be perfect.
The first ball head I found from my workshop, was this vice:

I cut off the upper vice part, and the lower clamp part, so I was left with a nice strong ball head. Instead of the original not-so-good clamp I used a KUPO Convi clamp. You can get them from any lights sales/rental company. The result looked like this:


Now, having the hardware more or less ready, the software part.
It’s quite easy once you have found all the great tutorials from web. So my software side solution was like this:
- A Raspberry Pi running Raspbian
- gphoto2 controlling the camera
- crontab taking care of running the gphoto2 at the right time
A quick tutorial:
- Install Raspbian
- Configure the Raspberry with raspi-config. There are couple of important things to notice: 1) change the user password. 2) disable boot to Desktop/Scratch. Booting to desktop will create some driver errors when accessing the camera. 3) set the correct timezone. 4) ensure that SSH is enabled.
- Give your Raspberry a static IP address.
- Install the gphoto2 and libusb. I used a nice simple tutorial in Geekingabout.
- After completing the installation, run “sudo apt-get install gphoto2”, to fix some path problems for crontab.
Because of a bug in gphoto2, it’s necessary to reset the USB connection every time the camera has been accessed by Raspberry. To do this, follow the instructions on this page
I haven’t tried it myself yet, but there should be a fix for this in gphoto 2.5.3. See the instructions here.- Now if you run “
sudo ./usbreset /dev/bus/usb/001/004 ;gphoto2 –set-config capturetarget=1 ; gphoto2 –capture-image >/dev/null 2>&1″ , your camera should take a picture and store it to camera’s memory card. You may have to replace the /004 with other number – run “lsusb” to find out the Bus and Device ID for your camera. Notice that the Device ID changes every time you toggle the camera power when it’s connected to Raspberry, but it is always the same after reboot. - I used crontab to schedule the picture taking. I wanted to take one picture every day in every 15 minutes, from 7am to 7pm, so I ran “crontab -e” and wrote “0,15,30,45 07-18 * * *
sudo ./usbreset /dev/bus/usb/001/004 ;gphoto2 –set-config capturetarget=1 ; gphoto2 –capture-image >/dev/null 2>&1″
Now your system should be ready. I’m using a 4GB Eye-Fi SD card, which connects to the router, and uploads taken photos. The card has an “Endless memory” feature, which deletes uploaded pictures from the card, so I don’t have to worry about it getting full.
To remotely access the system, I registered a dynamic DNS, and set up a port forwarding in the router to Raspberry’s IP. I’m using putty as terminal client to SSH into Raspberry. It’s also wise to enable Remote management in the router, in case you need to change any router’s settings remotely. I’m also using a GSM relay to cut all the power in case something totally crashes.
As it soon turned out, the PVC pipe around the window wasn’t enough to keep away snow and rain. So I installed additional plastic walls and roof:


I was a little worried about the temperature inside the box in the summer, because it’s black and standing in a direct sunlight. As I checked a couple of times, the Pi’s internal temp sensor reported around 50-55 degrees on a hot summer day (as hot as it gets in Estonia:) ), and I didn’t notice any problems caused by possible overheating.
Just in case I added two bags of silicagel in the box, to deal with possible moisture.
UPDATES ON THE NEXT VERSION OF THE SUITCASE:
The improvements I’ve planned:
- build one multi-voltage power supply to get rid of the power adaptors
- add a small macro focusing rail to be able to move the camera in the case. It’s necessary if you want a wider angle – with my current setup it’s possible to use max 35mm focal length before the edges of UV filter become visible on the picture.
- add a temperature sensor into the case.
- use a router with GSM modem built in. Turns out it is quite hard to find a router-USB modem combo, which would work nicely together, and wouldn’t drop the connection from time to time.
First, I used a bit bigger case for ver.2 – Explorercase 2717 to fit larger cameras like Canon 5D or 6D.
I bought a 9V 4.5A power supply and a couple of buck converters from eBay, so I don’t need a separate adapter for each piece of equpiment:

Also, I found a 2-way macro shot focusing rail slider to be able to move the camera inside the case for wider angles:

Instead of an old Tenda router, I’m using a D-link DWR-921 4G router which has a built-in GSM modem.


Since I’m trying to make the system suitable for different cameras, and some Canon models don’t use SD-cards, I decided to take the Eye-Fi card out from the camera, and connect it directly to Raspberry. I used the Eye-Fi USB-SD-card adapter for that.
There’s a strange problem with the Eye-Fi card – when constantly powered on, it doesn’t delete the old, already uploaded pictures. I’m trying to solve this problem by regularly cutting the card’s power. For that I desoldered a card’s VDD pin (5) from a USB-SD adapter, and used a P-channel MOSFET driven by a GPIO pin to toggle it. On software side, there’s a great GPIO utility called WiringPi to switch the pins, and using Crontab, an automated on-off sequences can be made.
I haven’t had time to test if that idea solves the endless memory problem. I’ll update the info as soon as I’ve done the tests.

Why’d you cross out the USB reset? I am doing a similar project and I found I needed to do that.
My project is to use an old DSLR w/raspi and gphoto to take pictures of the creatures that are tearing up my back yard at night. Only thing I have left is to make a weatherproof enclosure. well, that and upload the photos somewhere so I don’t have to bring the raspi in to see the results.
Nice project!
Hi Miles
I crossed it out because the bug should be fixed in new release of gphoto2. I haven’t tried it myself though.
Nice work.
I’ve one done using android, I can send files remotely if too, and nothing is saved on camera which is handy. Getting the connectivity though – that’s the hassle.
suppose an ol’ link would help
Nice. Did you have any issue with water getting into the enclose through the lense whole i was thinking of using a mechanical iris to stop water getting in.
No, I had absolutely no problems that would have been caused by weather. I glued the UV filter with epoxy glue to the case.
Nice setup, Gphoto is able to pull the photo onto the rpi, which would do away with the need for the wifi card. You’d need to do some file management on the pi, but potentially could just have the camera connect to the pi connected to the GSM modem.
Great project. Thanks for sharing. I’m stuck on the part using an Eye-Fi SD card which connects to the router and uploads taken photos. Did you flash the router with alternative firmware like OpenWRT?
Hi Gero
The Eye-Fi doesn’t care which firmware the router uses.
I had a problem that the card didn’t upload the photos over the internet, but did when I connected my computer to the same router. I can’t remember what exactly was the problem, but it had something to do with the fact that I configured the card while being connected to my home WIFI, but the card was supposed to work in another network.